When it comes to installing windows, understanding the process can ensure that the project is executed seamlessly while reducing stress. A professional window installation follows a structured approach designed to deliver durable results with minimal disruption. Below is an overview of what typically happens during such a process.
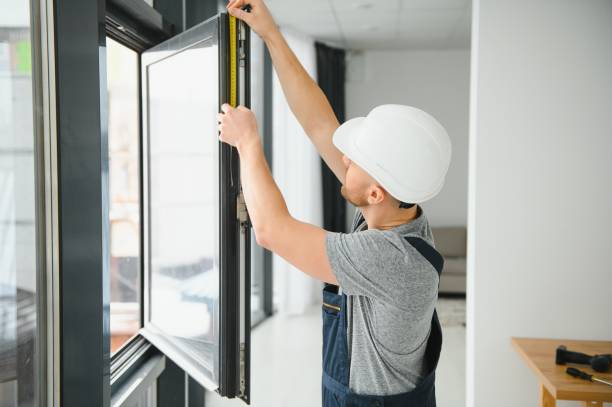
Initial Assessment and Measurements
Before the installation begins, professionals will conduct an initial assessment of your home or property. This step ensures that:
– The correct type of windows is selected based on your specific needs.
– Accurate measurements are taken to guarantee a precise fit.
This stage is crucial in avoiding future issues such as drafts, leaks, or misaligned frames.
Key actions during this step:
– Inspect the current window frames for damage or rot.
– Measure dimensions for custom or standard sizing requirements.
– Identify potential challenges, such as structural issues around the window opening.
Preparing the Workspace
On installation day, preparation is essential for both efficiency and cleanliness. Installers will typically:
– Remove furniture, curtains, and blinds near the work area.
– Lay protective coverings on floors and surrounding surfaces to avoid damage or debris accumulation.
These measures not only protect your property but also reduce clean-up time post-installation.
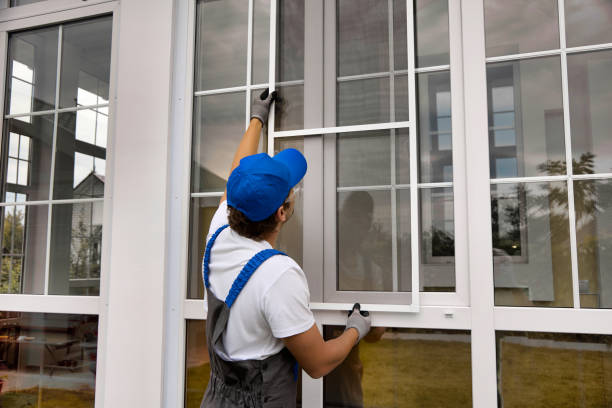
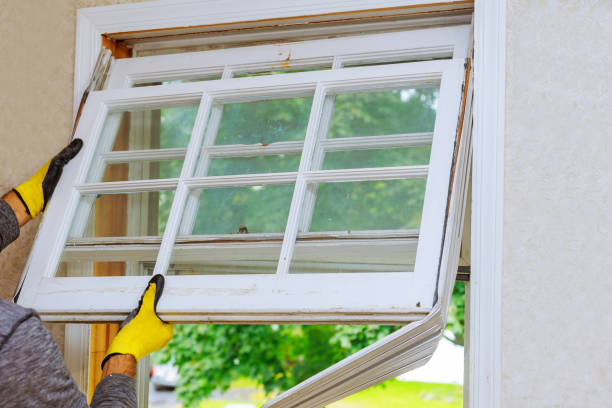
Removing Old Windows
The next step involves carefully removing old windows without causing unnecessary damage to surrounding areas like walls or trim. Professionals use specialized tools for this purpose, ensuring safety and precision.
Steps involved:
1. Loosen caulking or sealant around the existing window frame using appropriate tools. 2. Unscrew fasteners holding the old frame in place. 3. Gently remove glass panes and frames while minimizing breakage risks.
Installing New Windows
Once the old windows are out of the way, it’s time to install new ones. This stage requires meticulous attention to detail since proper alignment and sealing are critical for long-term performance.
Key aspects include: – Positioning: Ensuring that the new window fits snugly into place without gaps. – Securing: Using screws and fasteners to anchor the window securely within its opening. – Sealing: Applying weather-resistant caulk or insulation foam around edges to prevent air leaks and water penetration.
Quality Inspection
After installation, professionals will inspect their work thoroughly before declaring it complete. This involves checking:
– Straightness and alignment of frames. – Proper operation of sashes (opening/closing smoothly). – Seals to ensure there are no gaps allowing air drafts or moisture infiltration.
A quality inspection guarantees that your new windows meet industry standards for durability and energy efficiency.
Final Cleanup
Post-installation cleanup is vital in leaving your home in pristine condition after work concludes: – Removing protective coverings from flooring. – Disposing of old materials like glass panes responsibly. – Wiping down smudges from newly installed windows for clarity.
| Stage | Key Activities |
| Assessment | Measuring dimensions; identifying challenges |
| Preparation | Clearing area; protecting surfaces |
| Removal | Taking out old frames carefully |
| Installation | Positioning; sealing; securing new windows |
| Inspection | Checking alignment & functionality |
| Cleanup | Disposing debris; wiping surfaces clean |
By knowing what happens during a professional window installation process, homeowners can make informed decisions about their project while ensuring excellent results that enhance both aesthetics and functionality in their living spaces.
Comprehensive Guide to Window Installation Rockville: Insulating and Sealing for Optimal Efficiency
Improperly insulated and sealed windows can lead to significant energy loss, higher utility bills, and discomfort in your home. By taking the time to properly insulate and seal window frames, you can improve energy efficiency, enhance indoor comfort, and even increase the lifespan of your windows. Below is a detailed guide on how to effectively insulate and seal window frames.
Why Insulating and Sealing Windows Is Important
Well-insulated and sealed windows:
– Reduce heat transfer (keeping your home warmer in winter and cooler in summer).
– Minimize air leaks that cause drafts.
– Lower energy consumption by improving HVAC system efficiency.
– Prevent moisture buildup that could lead to mold or structural damage.
Tools You’ll Need
Before starting the process, gather these essential tools:
– Caulk gun & silicone or latex caulk (for sealing gaps)
– Weatherstripping material (foam tape, V-strip, or door sweeps)
– Utility knife or scissors (for cutting insulation materials)
– Putty knife (to remove old caulk)
– Expanding foam insulation (for larger gaps around window frames)
– Cleaning supplies (mild detergent and water for surface preparation)
Step 1: Inspect the Current Condition of Your Windows
Begin by carefully assessing your windows for signs of poor insulation or sealing issues. Look for:
1. Visible gaps between the frame and wall.
2. Drafts felt around edges during windy days.
3. Condensation forming between panes or along the interior frame.
Take note of all areas requiring attention so nothing is overlooked during repairs.
Step 2: Clean the Window Frame Area
A clean surface ensures better adhesion when applying caulk or weatherstripping materials:
1. Remove any old caulking using a putty knife or scraper. 2. Wipe down surfaces with a damp cloth to remove dirt, dust, or debris. 3. Allow everything to completely dry before proceeding.
Step 3: Seal Gaps with Caulk
Follow these steps to seal small cracks and gaps around your window frame:
1. Load a tube of silicone-based caulk into a caulking gun. 2. Apply steady pressure as you run a continuous bead along visible cracks. 3. Smooth out the line with a damp finger or caulking tool for an even finish. 4. Let it cure according to manufacturer instructions before touching.
Pro Tip: Use clear-colored caulk if you’re concerned about aesthetics near painted surfaces.
Step 4: Add Weatherstripping
For movable parts like sashes that require additional insulation:
1. Measure each section where weatherstripping will be applied. 2. Cut foam tape or V-strip material with scissors/utility knife accordingly. 3. Peel off adhesive backing from weatherstripping material while pressing firmly onto clean edges.
Weatherstripping provides flexibility while reducing airflow without obstructing operation.
Step 5: Fill Larger Gaps with Expanding Foam
If there are significant spaces between your wall structure and window frame that cannot be sealed with caulk alone: 1. Use an expanding foam product designed specifically for windows/doors (low expansion preferred).
2. Insert nozzle into gaps before dispensing foam slowly—avoid overfilling as it expands quickly!
3 Trim excess hardened foam using sharp tools after curing fully post-installation period (~24 hours).
Comprehensive Guide to Window Repair Rockville MD: Sealant Types for Window Frames
| Sealant Type | Best Used For | Durability | Ease of Application |
| Silicone Caulk | High-moisture areas & weather exposure | Long-lasting | Moderate |
| Latex Caulk | Indoor repairs & painting-required surfaces | Medium | Easy |
| Expanding Foam | Filling large voids/gaps; structural uses | Very durable | Slightly challenging |
By following these steps carefully, homeowners can achieve proper insulation around their windows while enjoying noticeable savings on heating/cooling costs throughout each season!
Step-by-Step Guide to Rockville Window Replacement for Improved Insulation and Efficiency
Improperly insulated or sealed window frames can lead to higher energy bills, drafts, and discomfort in your home. Addressing this issue can significantly enhance your home’s energy efficiency and comfort. Below is a step-by-step guide to insulating and sealing your window frames effectively.
Tools and Materials Needed
Having these items ready ensures a smoother process.
Step 1: Inspect the Window Frames
- Feeling drafts around the frame edges.
- Noticing visible cracks or separations in the frame or caulking.
- Condensation buildup near the glass during colder months.
Use a flashlight to identify smaller gaps that might not be immediately noticeable.
Step 2: Clean the Area Thoroughly
- Remove any old caulking or sealant using a putty knife.
- Wipe down the window frame using a damp rag or sponge to remove dirt and debris.
- Allow the area to dry completely before proceeding further.
Step 3: Seal Smaller Gaps with Caulk
For cracks measuring less than ¼ inch wide, silicone-based caulk works best since it is durable and weather-resistant.
- Load the caulk gun with a tube of silicone caulk.
- Apply a steady bead of caulk evenly along all visible gaps.
- Smooth out the applied caulk with your finger or a putty knife for an even finish.
- Allow time for it to cure (refer to product instructions for curing times).
Step 4: Add Weatherstripping Around Moveable Parts
Weatherstripping is essential for sealing operable parts of windows such as sashes that open and close.
- Measure the length of each side of the moveable part where weatherstripping will be applied.
- Cut weatherstripping material according to these measurements.
- Peel off any adhesive backing (if applicable) and press firmly into place along all edges that need sealing.
| Type | Best Use Case |
| Foam Tape | Irregular gaps on sliding windows |
| Felt Strips | Budget-friendly option; light-duty use |
| Rubber Seals | Heavy-duty options for harsh climates |
Choose based on your home’s specific needs.
Step 5: Insulate Larger Gaps with Spray Foam
- Shake the expanding foam can thoroughly before application.
- Insert its nozzle into larger gaps carefully without overfilling—foam expands significantly after application.
- Trim away excess foam after it hardens using a utility knife.
Ensure proper ventilation when handling spray foam as it emits fumes during application.
Step 6: Test Your Work
- Close all windows securely.
- Lightly run your hand around all edges while inside; if no drafts are felt, you’ve successfully sealed them.
- For added verification, perform a smoke test by holding an incense stick near sealed areas—no smoke movement indicates effective insulation.
Sealing window frames properly not only helps reduce energy waste but also enhances indoor comfort throughout seasonal changes while prolonging the life of existing windows systems when done correctly.
Tips for Preparing Your Home for Rockville Windows Replacement or Repair
Proper preparation is essential to ensure a hassle-free and efficient window replacement or repair process. Taking the necessary steps before professionals arrive can save time, reduce stress, and help protect your home during the project. Below is a guide on how to get your home ready.
Clear the Work Area
- Furniture: Move couches, tables, and other large furniture away from windows.
- Curtains and Blinds: Remove window coverings such as curtains, blinds, or shades.
- Wall Decorations: Take down any frames or decor near the windows to prevent accidental damage.
- Outdoor Items: Move outdoor furniture, planters, or ornaments that may block exterior access.
Protect Your Belongings
- Use drop cloths or plastic sheets to cover nearby furniture.
- Roll up rugs in areas where work will take place.
- Store fragile items (e.g., vases, mirrors) in a safe location away from high-traffic zones.
Provide Easy Access for Professionals
- Ensure there is enough space for workers to move their tools and equipment freely.
- Unlock doors or gates that provide access to exterior areas around your home.
- If parking is limited in your area, reserve a spot for the contractor’s vehicle close to your property.
Address Safety Concerns
- Keep children away from work zones by creating barriers if necessary.
- Place pets in another room or secure outdoor space until the project is completed.
Communicate with Your Contractor
- Confirm the start date and time of work.
- Discuss any specific concerns you have about protecting your property.
- Review details regarding warranties, cleanup policies, and any additional services provided.
Checklist for Home Preparation
| Task | Completed (✔/✘) |
| Furniture cleared from work areas | |
| Window coverings removed | |
| Nearby items covered/protected | |
| Children/pets secured | |
| Exterior obstacles cleared | |
| Contractor communication confirmed |
By following these steps carefully, you’ll create an environment where contractors can focus on delivering high-quality results efficiently while minimizing disruptions to your daily routine.
Top Reasons to Upgrade Damaged or Outdated Windows in Rockville MD Homes
Upgrading your windows is more than just an aesthetic improvement; it’s a strategic investment that can enhance your home’s overall value, functionality, and comfort. Damaged or outdated windows may seem like a minor inconvenience, but they can lead to significant issues such as energy inefficiency, increased maintenance costs, and reduced curb appeal. Below are the major benefits you can expect when upgrading your home’s windows.
1. Improved Energy Efficiency
- Double or Triple Glazed Glass: Reduces heat loss during winter and minimizes heat gain in summer.
- Low-E Coatings: Reflect infrared light while allowing natural light to enter.
- Gas Fills: Argon or krypton gas between panes enhances insulation.
By reducing energy use for heating and cooling, these upgrades often lower utility bills significantly.
2. Enhanced Home Comfort
- Blocking cold air drafts during winter.
- Reducing exterior noise levels with insulated glass.
- Preventing water leaks that could lead to mold growth.
When your home feels more comfortable year-round, you create a better living environment for everyone.
3. Increased Security
| Feature | Benefit |
| Laminated Glass | Resists shattering upon impact. |
| Multi-Locking Systems | Provides enhanced burglary resistance. |
| Tempered Glass | Safer during breakage (breaks into small fragments). |
These updates ensure peace of mind for homeowners.
4. Boosted Curb Appeal
- Vinyl Frames: Known for durability with minimal upkeep.
- Wood Frames: Offer timeless elegance but require regular care.
- Aluminum Frames: Provide a sleek modern look while being lightweight.
An upgraded window design enhances the overall visual appeal of your property, making it more attractive to future buyers.
5. Higher Property Value
Investing in high-quality replacement windows can significantly increase your home’s resale value. According to industry studies, homeowners recoup a substantial percentage of their window replacement costs through higher property valuations upon sale.
Final Thoughts
Upgrading damaged or outdated windows is a practical decision with far-reaching benefits beyond aesthetics alone. From improved energy efficiency and comfort to greater security and long-term savings on maintenance costs, modernizing your windows adds considerable value to both your living experience and financial investment in your property.
Top Factors to Consider When Choosing the Best Windows for Your Property
Selecting the right windows for your property is a critical decision that impacts not only your home’s aesthetic appeal but also its energy efficiency, security, and overall value. With so many options available in the market, understanding the factors that should guide your decision can ensure you make an informed investment. Below are essential considerations to keep in mind when choosing the best windows for your property.
1. Material Options
- Vinyl: Affordable, low-maintenance, and energy-efficient.
- Wood: Classic aesthetic with excellent insulation properties but requires regular upkeep.
- Aluminum: Lightweight and durable but less insulating compared to other materials.
- Fiberglass: Stronger than vinyl with improved insulation capabilities but at a higher cost.
2. Energy Efficiency
- Double or triple glazing (multiple panes of glass).
- Low-E (low-emissivity) coatings to reflect heat.
- Gas fills like argon or krypton between panes for insulation.
- ENERGY STAR-rated windows suitable for your climate zone.
| Feature | Benefit | Ideal For |
| Double Glazing | Reduces heat transfer | General energy efficiency |
| Low-E Coatings | Reflects thermal radiation | Hot or cold climates |
| Gas Fills | Enhances insulation | Extreme temperature zones |
| Triple Glazing | Maximum thermal performance | Harsh weather conditions |
3. Style and Design
- Casement Windows: Hinged at the sides; ideal for ventilation.
- Double-Hung Windows: Feature two operable sashes; versatile and easy to clean.
- Sliding Windows: Horizontal operation; space-saving design.
- Bay and Bow Windows: Protrude outward to create additional space inside.
Select a style that blends well with your property’s architecture while meeting functional needs.
4. Local Climate Conditions
- In hot climates, prioritize UV protection and heat reflection capabilities.
- In colder regions, focus on thermal insulation properties to minimize heat loss.
5. Durability and Maintenance
- Vinyl is virtually maintenance-free but may not suit traditional aesthetics.
- Wood requires painting or sealing over time to prevent rot or warping.
Choose a material that aligns with how much time you’re willing to dedicate to upkeep.
6. Budget Considerations
- Initial purchase price vs lifetime costs (maintenance/replacement).
- Warranty coverage offered by manufacturers.
7. Security Features
- Multi-point locking systems for added reinforcement.
- Tempered glass resistant to breakage from impact.
Prioritize safety by ensuring that selected products meet security standards.
Making an informed choice when selecting new windows ensures they add both functionality and beauty to your home while standing up against environmental challenges over time. A thorough comparison of materials, features, styles, and cost can help you select windows tailored perfectly for your property’s unique requirements.
The Complete Guide to Ensuring Quality Window Repairs That Last
Ensuring that window repairs are long-lasting involves a combination of using high-quality materials, following best practices, and paying attention to detail during installation or repair. Below is a comprehensive guide on how to achieve quality window repairs that stand the test of time.
Understanding the Common Causes of Window Damage
- Weather-related damage: Prolonged exposure to extreme temperatures, rain, snow, and hail can weaken your windows over time.
- Poor installation: Improperly installed windows can lead to gaps, leaks, and structural instability.
- Wear and tear: Over time, moving parts like hinges and locks may deteriorate or fail.
- Moisture intrusion: Water seeping through cracks or damaged seals can lead to rot and mold.
Steps for Long-lasting Window Repairs
- Inspect the entire window frame for cracks or warping.
- Check for rot or decay in wooden components.
- Look for broken glass panes or compromised seals.
- Use high-quality sealants such as silicone-based caulk for durability.
- Opt for tempered glass if replacing panes—it’s stronger and safer than traditional glass.
- For wooden frames, select rot-resistant wood like cedar or use wood treated with preservatives.
- Use Proper Tools
A successful repair requires appropriate tools such as: - Putty knife
- Screwdrivers
- Caulking gun
- Measuring tape
- Power drill (if necessary)
- Replace Damaged Components
If certain parts of your window are beyond repair: - Replace cracked panes with new glass.
- Install fresh weatherstripping around sashes to prevent air leaks.
- Swap out worn hardware such as hinges or locks.
- Seal Gaps and Cracks Effectively
Proper sealing extends the life of your repairs: - Apply caulk around edges where the frame meets walls to block drafts.
- Use foam insulation for larger gaps within frames before sealing them.
- Ensure Waterproofing
To protect against future moisture damage: - Add a waterproof membrane on exterior-facing surfaces if possible.
- Test your repaired window with water spray after installation.
Maintenance Tips After Repairs
- Clean windows regularly using non-abrasive products to avoid scratching glass or damaging seals.
- Inspect caulking annually; reapply if you notice cracks or peeling areas.
- Lubricate moving parts like locks and hinges every few months to reduce wear.
- Keep an eye out for condensation between double-pane windows—this could indicate seal failure requiring additional attention.
Table: Recommended Materials & Their Benefits
| Material | Benefits | Example Usage |
| Silicone Sealant | Flexible, durable, waterproof | Sealing gaps around frames |
| Tempered Glass | Stronger than regular glass; shatter-resistant | Replacing damaged panes |
| Weatherstripping Foam/Rubber | Prevents drafts; blocks air leakage | Insulating sashes |
| Rot-resistant Wood | Longer lifespan in humid conditions | Replacing decayed wooden components |
By following these guidelines and using proper materials along with routine maintenance practices, you can ensure that your windows stay functional and durable for years without needing frequent repairs.
- Step-by-Step Guide to Expert Window Installation Rockville Homeowners Can Trust
- The Complete Guide to Window Installation Rockville: DIY vs. Professional Approaches
- What to Expect During a Professional Replacement Windows Rockville MD Installation Process
- Expert Tips for Installing Replacement Windows Rockville MD Homes Need
- Replacement Windows Rockville MD: Comprehensive Installation Best Practices Guide