When it comes to window replacement, homeowners are often faced with the decision of tackling the project themselves or hiring a professional. Each approach has its advantages and disadvantages, and understanding these can help you make an informed choice based on your time, budget, skill level, and expectations.
DIY Window Replacement: Pros and Cons
Advantages:
– Cost Savings:
One of the most significant benefits of a DIY approach is cost savings. You can save on labor costs by doing the work yourself.
- Control Over the Process:
A DIY project allows you to work at your own pace and have complete control over material selection, scheduling, and execution. - Skill Development:
For hands-on homeowners who enjoy learning new skills, replacing a window can be an opportunity to expand your knowledge in home improvement.
Disadvantages:
– Time-Consuming:
Without prior experience, replacing a window can take significantly longer than expected due to trial-and-error learning.
- Specialized Tools Required:
Some tools necessary for proper installation may not be readily available at home, requiring additional investment. - Potential for Mistakes:
Improper installation can lead to drafts, water leaks, or energy inefficiency, potentially costing more in repairs later.
Professional Window Installation: Pros and Cons
Advantages:
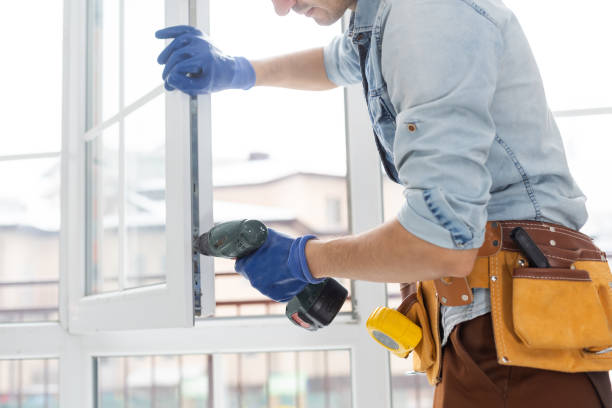
– Experience and Expertise:
Professionals have the training and experience necessary to handle various types of windows efficiently while meeting building codes.
- Time-Efficiency:
A professional team typically completes replacements much faster than DIY efforts due to their expertise and access to appropriate tools. - Warranty Protection:
Many professional installation services offer warranties that cover workmanship issues or future problems related to their work.
Disadvantages:
– Higher Upfront Costs:
Hiring professionals involves labor fees that typically increase the overall cost of the project compared to doing it yourself.
- Less Control Over Scheduling or Materials Selection (in some cases):
Depending on the company’s availability or policies, you may have less flexibility in choosing specific materials or timelines.
Key Factors for Decision-Making: DIY vs. Professional
| Factor | DIY Approach | Professional Installation |
| Cost | Lower upfront costs | Higher upfront costs |
| Time Commitment | Longer due to lack of expertise | Faster due to experience |
| Quality | Dependent on skill level | High-quality workmanship guaranteed |
| Tools Needed | May require buying/renting new tools | Comes with all necessary tools |
| Risk Level | Higher chance of mistakes | Minimal risk with trained professionals |
Tips for Choosing Your Approach
- Evaluate your skill level honestly—if you’re unfamiliar with using power tools or construction techniques, consider hiring an expert.
- Calculate total costs by factoring in both materials for DIY work and potential long-term repair expenses if mistakes are made.
- Research local contractors thoroughly; read reviews before selecting one for professional services.
- Start small—if you’re set on trying DIY but unsure about your capabilities, begin with a less-visible window before attempting larger projects like bay windows.
- Consider safety—working with large panes of glass poses risks that professionals are better equipped to manage safely.
Both approaches have their merits depending on your circumstances; carefully weighing these pros and cons will help guide your decision toward successful results tailored specifically for your needs as a homeowner.
Exploring the Advantages of Professional Replacement Windows Rockville MD Services
When it comes to replacing windows, homeowners are often faced with the decision to either do it themselves or hire a professional. While DIY projects may seem appealing from a cost-saving perspective, hiring a professional offers several distinct advantages. Let’s explore the key benefits of opting for professional window replacement services.
Trusted Expertise in Window Repair Rockville MD
- Poor insulation leading to energy loss
- Water leaks caused by improper sealing
- Gaps that compromise security and aesthetics
Professionals use specialized tools and follow industry standards to ensure a flawless fit, which can be challenging for those unfamiliar with the process.
Discover the Time-Saving Advantages of Rockville Window Replacement
Replacing windows can be time-consuming if you lack experience. Professionals streamline the process by working quickly without sacrificing quality. This is especially important if you’re replacing multiple windows or working on a tight schedule. A project that might take an inexperienced DIYer several days can often be completed by professionals within hours.
| Task | DIY Time Estimate | Professional Time Estimate |
| Measuring & Preparing | 2–3 hours | 30–60 minutes |
| Removal of Old Windows | 1–2 hours/window | 15–30 minutes/window |
| Installing New Windows | 2–4 hours/window | 30–45 minutes/window |
| Sealing & Finishing Touches | 1+ hour | ~30 minutes |
Find Top-Quality Rockville Windows for Your Home
Window replacement companies often source high-quality materials at better prices due to their relationships with manufacturers. These materials include energy-efficient glass options, durable frames, and advanced sealing products that may not be readily available at retail stores for individual buyers.
- Access to customized window options tailored to your home needs
- Materials backed by manufacturer warranties
- Expert advice on selecting windows suited for your climate and architectural style
Warranties and Guarantees for Windows Rockville MD
Another significant advantage of hiring professionals is the peace of mind offered by warranties on both labor and materials. Most reputable companies provide workmanship guarantees, ensuring that any issues resulting from faulty installation are promptly addressed at no additional cost.
- Coverage for material defects
- Assurance against installation errors
- Long-term protection for your investment
DIY projects typically lack these protections, leaving homeowners responsible for any mistakes or damage.
Enhanced Safety Measures
- Proper lifting techniques
- Use of scaffolding or ladders with fall protection
- Safe removal methods preventing glass breakage
By hiring experts, you minimize potential injuries while ensuring compliance with local building codes.
Improved Energy Efficiency
Properly installed windows play a crucial role in maintaining energy efficiency within your home. Misaligned frames or poor seals can lead to drafts and increased heating/cooling costs over time. Professional installers ensure airtight seals and precise alignment, maximizing energy savings from day one.
Opting for professional window replacement services ultimately provides long-term value through expert execution, superior materials, added safety measures, warranties, and improved efficiency—making it an excellent investment in your home’s comfort and functionality.
What to Expect from Professional Window Installation Services
When opting for professional window installation services, homeowners can anticipate a seamless and efficient process designed to enhance the performance, appearance, and longevity of their windows. Below is an in-depth exploration of what you can expect during this process.
1. Initial Consultation and Assessment
- Evaluation of Existing Windows: Technicians inspect your current windows for structural integrity, damage, or other issues.
- Customized Recommendations: Based on your needs, they will suggest the best materials, styles, and designs tailored to your home.
- Detailed Cost Estimate: A transparent, itemized quote helps you understand labor charges, material costs, and timelines.
2. Precision Measurements
| Measurement Type | Purpose |
| Width & Height | Ensures the new window fits snugly into the frame |
| Frame Depth | Determines compatibility with existing wall structures |
| Corner Angles | Ensures the frame aligns properly with wall geometry |
This step minimizes common issues like air leaks or improper alignment.
3. Material Procurement
- Durable materials resistant to weathering
- Energy-efficient glass options (e.g., Low-E coatings)
- Reliable brands backed by warranties
4. Expert Installation Process
- Site Preparation: Professionals protect furniture and floors near work areas by covering them.
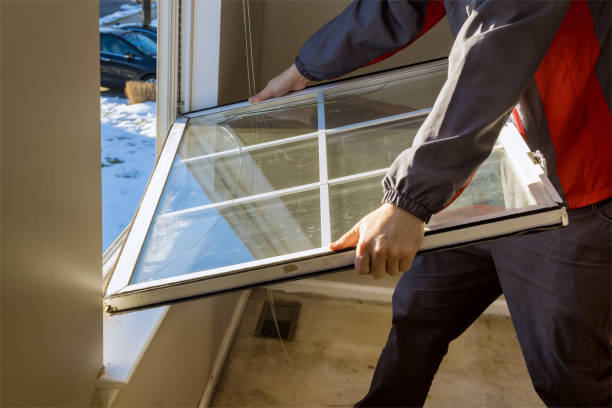
- Removal of Old Windows: Existing windows are carefully removed without damaging surrounding structures.
- Frame Inspection & Repairs: They inspect window openings for signs of rot or damage and make necessary repairs before proceeding.
- Precise Placement: New windows are positioned perfectly within the frame using industry-grade equipment.
Key Benefits: – Proper sealing prevents drafts and enhances energy efficiency. – Secure anchoring ensures long-term stability.
5. Thorough Cleanup Post-installation
- Disposing of old windows responsibly
- Vacuuming dust or debris from work areas
- Restoring furniture or blinds to their original positions
This attention to detail means minimal disruptions for homeowners.
6. Final Inspection & Walkthrough
✔ Verify that all seals are airtight
✔ Confirm functionality (e.g., smooth opening/closing)
✔ Address any remaining questions or concerns
They also provide maintenance tips to help you prolong the life of your new windows.
Why Choose Professional Window Installation?
- Guaranteed workmanship backed by warranties
- Faster completion times due to expertise
- Access to specialized tools and high-grade materials
- Compliance with building codes and safety standards
Leveraging these benefits ensures not only beautiful results but also peace of mind knowing your investment is protected long-term.
Time-Efficient Solutions for Seamless Window Replacement Projects
When it comes to window replacement, time efficiency plays a critical role in ensuring the project runs smoothly and causes minimal disruption to your daily routine. Whether you opt for a professional installation or a DIY approach, understanding how to streamline the process can save valuable time while maintaining quality results. Below, we’ll explore ways to achieve seamless and time-efficient window replacement.
Benefits of a Time-Efficient Window Replacement
- Reduced Downtime: Minimizing the duration of the project means less inconvenience, especially in high-traffic areas of your home or office.
- Cost Savings: Shorter timeframes often translate to lower labor costs for professional installations.
- Energy Efficiency Gains: Replacing drafty or damaged windows quickly ensures you reap energy-saving benefits sooner.
- Enhanced Security: Faster replacements eliminate prolonged exposure to potential security risks caused by compromised windows.
Strategies for Quick and Seamless Replacement
1. Pre-Planned Measurements and Materials
- Measure your window openings precisely before ordering materials or scheduling work.
- Ensure all tools and materials are ready in advance, including:
- Measuring tape
- Pry bars
- Utility knives
- Caulk and caulking gun
- Insulation foam
- For professionals, request that they conduct an initial site visit to assess requirements.
2. Choose Energy-Efficient Pre-Fabricated Windows
- Opt for pre-fabricated windows that fit standard sizes. These are quicker to install than custom designs while still offering energy efficiency benefits.
- Use double-pane or triple-pane glass options with low-emissivity (Low-E) coatings for long-term performance.
3. Schedule During Optimal Weather Conditions
Weather can significantly impact how smoothly your project progresses: – Plan replacements during mild weather months (spring or fall) to avoid delays caused by rain or extreme temperatures. – If unavoidable, ensure proper coverings like tarps are readily available.
4. Professional Services with Streamlined Processes
Hiring experienced professionals often speeds up the process due to their expertise: – They bring specialized tools designed specifically for window removal and installation. – Their familiarity with building codes reduces delays caused by inspections or compliance issues.
Time Comparison: DIY vs Professional Installation
| Aspect | DIY Approach | Professional Installation |
| Preparation Time | Longer due to lack of experience | Minimal; handled by experts |
| Installation Speed | Typically slower | Faster due to advanced tools |
| Error Correction | May require additional days | Addressed immediately |
| Overall Timeline | Variable | Predictable based on contracts |
Tips for Avoiding Delays
To further minimize delays during your window replacement project: – Double-check measurements before purchasing materials. – Keep backup supplies on hand in case of errors (e.g., extra screws, caulk). – If working with a contractor, confirm timelines ahead of time and address potential obstacles during consultations. – Regularly clean up debris during the installation process to maintain a safe work area and prevent interruptions.
By focusing on preparation, planning around external factors like weather, and leveraging professional expertise when needed, you can ensure that your window replacement is both seamless and efficient. This structured approach not only saves time but also supports long-term durability and functionality of your newly installed windows.
Ensuring Peace of Mind with Warranties on Window Replacement Services
When investing in window replacement services, warranties play a pivotal role in providing long-term peace of mind and financial protection. They ensure that your investment is safeguarded against unexpected issues, offering reassurance about the quality of materials and workmanship. Below, we break down why warranties are essential, what they typically cover, and how to make the most of them.
Why Warranties Matter
- Financial Protection: If defects or issues arise, repair or replacement costs are often covered under warranty.
- Quality Assurance: Warranties reflect confidence in the durability and performance of materials and installation.
- Longevity: They encourage proper maintenance by outlining specific care practices to maintain coverage.
By opting for window replacement services that include comprehensive warranties, homeowners reduce risks associated with installation errors or defective products.
Common Types of Window Replacement Warranties
Not all warranties are created equal. Understanding the different types can help you make an informed decision when selecting a service provider.
| Warranty Type | Coverage Details | Typical Duration |
| Product/Manufacturer Warranty | Covers defects in the window material (e.g., glass seals, frames). | 10–20 years (or lifetime) |
| Workmanship/Installation Warranty | Covers errors caused during installation (e.g., poor sealing or improper fitting). | 1–5 years |
| Glass Breakage Warranty | Offers protection against accidental glass breakage under certain conditions. | Varies by provider |
Always review the fine print to understand coverage limitations and exclusions.
Key Questions to Ask About Warranties
- Determine whether it includes labor, parts, or both.
- Understand scenarios that might void your warranty (e.g., neglecting maintenance).
- A transferable warranty can add value if you sell your home.
- Familiarize yourself with the process for addressing issues under warranty.
Best Practices for Maintaining Your Warranty Coverage
- Follow all manufacturer-recommended maintenance protocols.
- Avoid DIY repairs that could compromise workmanship guarantees.
- Keep records of installation receipts and communication with providers.
- Document any problems promptly through photos or written descriptions.
Final Thoughts on Window Replacement Warranties
A robust warranty offers more than just financial coverage; it provides confidence in your investment and ensures long-term satisfaction with your new windows. By understanding what is offered and maintaining compliance with terms, you can maximize the benefits of this valuable safeguard while enjoying improved comfort and energy efficiency at home.
Important Considerations Before Starting Your DIY Window Replacement Project
Replacing a window on your own can be a rewarding project, but it requires careful planning and preparation to avoid potential pitfalls. Before embarking on a DIY window replacement, there are several critical factors to evaluate to ensure the process is successful and cost-effective.
Assessing Your Skill Level
- Are you familiar with using power tools like drills and saws?
- Have you worked with materials such as caulking, putty, or glazing before?
- Do you understand how to measure accurately for window installation?
If the answer to most of these questions is no, consider seeking guidance or hiring a professional.
Accurate Measurements
- Gaps that compromise energy efficiency.
- Poor alignment that affects functionality.
- The need for costly rework or adjustments.
To measure correctly: 1. Measure the width at three points: top, middle, and bottom. 2. Measure the height from three positions: left, center, and right. 3. Use the smallest measurement for both width and height when ordering your new window.
Selecting the Right Tools
| Tool Name | Purpose |
| Measuring tape | Ensures accurate dimensions |
| Pry bar | Removes old frames or trim |
| Caulk gun | Applies sealant around edges |
| Screwdriver/drill | Secures screws into place |
| Utility knife | Cuts old caulk or insulation |
Invest in high-quality tools if you don’t already own them. Poor-quality tools may lead to inefficiency or errors.
Evaluating Window Types
- Single-hung windows: Easier to install but offer limited ventilation.
- Double-hung windows: Provide better ventilation but may be more complex to install.
- Casement windows: Offer flexibility in opening direction but require precise installation due to hinges.
Researching different styles will help ensure your chosen replacement meets both functional and aesthetic requirements.
Accounting for Environmental Factors
- Weather Conditions: Avoid replacing windows during extreme weather (heavy rain, snow, high winds).
- Season: Spring and fall are ideal seasons due to milder temperatures.
- Energy Efficiency Needs: Consider insulated glass options if living in regions with extreme temperatures.
Budget Planning
DIY projects often aim to save money compared to professional services; however, it’s easy for costs to escalate unexpectedly without proper budgeting. When creating your budget: – Include costs for materials such as insulation tape or caulk. – Account for potential mistakes that might require additional purchases. – Compare prices at different retailers before committing.
Permits and Regulations
Some areas may require permits before replacing windows, particularly if structural changes are involved (e.g., enlarging an opening). Check local building codes or consult with city officials before starting work.
Proper planning is key when approaching a DIY window replacement project. By addressing safety concerns, gathering necessary tools, accounting for environmental factors, and taking accurate measurements upfront, you’ll reduce risks of costly errors while improving overall outcomes.
Key Safety Concerns to Address During a DIY Window Replacement Process
Undertaking a window replacement project yourself can be a cost-effective and fulfilling task. However, it also comes with significant safety risks that are often overlooked. Proper preparation and attention to safety protocols are essential to prevent injuries and ensure a successful outcome. Below, we’ll explore the critical safety concerns you need to address before starting your DIY window replacement project.
1. Handling Glass Safely
- Wear protective gloves: Use heavy-duty gloves specifically designed for handling glass.
- Use safety goggles: Shield your eyes from shards or debris while removing or installing windows.
- Dispose of broken glass responsibly: Use thick trash bags or containers explicitly designed for sharp objects.
| Material | Recommended Safety Gear |
| Glass panes (intact or broken) | Gloves, goggles, strong footwear |
| Wooden frames | Gloves |
2. Ladder Safety When Working at Heights
Replacing second-story or higher windows requires the use of ladders or scaffolding, which introduces fall hazards.
- Inspect your ladder: Ensure it’s sturdy and can support your weight along with any tools you’re carrying.
- Set up on stable ground: Avoid placing ladders on uneven surfaces.
- Follow the three-point contact rule: Always have two hands and one foot—or two feet and one hand—touching the ladder at all times.
3. Proper Tool Usage
- Familiarize yourself with tools: Read instruction manuals for power tools like drills and saws before using them.
- Keep tools in good condition: Dull blades or malfunctioning equipment increase the risk of accidents.
- Organize your workspace: Cluttered areas lead to tripping hazards that can result in tool-related injuries.
4. Asbestos Awareness
Older homes may have window frames that contain asbestos materials, particularly if they were constructed before 1980. Exposure to asbestos dust is highly dangerous and requires professional intervention.
- Avoid disturbing the material.
- Contact a licensed removal specialist for proper identification and removal.
5. Preventing Muscle Strain and Fatigue
Window panes, especially large ones, can be heavy and difficult to maneuver without help.
- Lift with your legs—not your back: Avoid bending directly over when lifting heavy materials to prevent strains.
- Work with a partner: Having an extra set of hands will make installation smoother while reducing physical strain.
6. Weather Conditions
- Wet surfaces increase slip hazards—schedule work during dry weather whenever possible.
- Strong winds may destabilize ladders or make it difficult to handle larger panes safely.
By addressing these key safety concerns, you’ll reduce risks significantly while ensuring that your DIY window replacement project runs smoothly from start to finish. Always weigh the potential dangers against other options such as hiring a professional installer if the job feels beyond your capabilities. Remember that safety should never be compromised in pursuit of cost savings or efficiency during home projects like this one.
Making the Right Decision: Choosing Between DIY and Professional Window Installation
When it comes to replacing or installing windows, homeowners often face the choice of tackling the project themselves or hiring a professional. Both approaches have their advantages and limitations, and making the right decision depends on several factors, including your skill level, budget, timeline, and safety concerns. Here’s a comprehensive breakdown to help you decide which option works best for your situation.
Factors to Consider When Choosing Between DIY and Professional Installation
- Skill Level and Experience
– DIY: A DIY window replacement requires basic carpentry skills, experience with tools like drills and levels, and an understanding of proper window sealing techniques. If you’re new to these tasks, you could risk improper installation. – Professional: Professionals bring years of experience to ensure installation meets industry standards. This minimizes issues like drafts, leaks, or misaligned framing. - Cost
– DIY: Doing it yourself can save money upfront as you avoid labor costs. However, you’ll need to invest in tools (if not already owned) and materials. – Professional: Hiring a professional involves paying for both labor and materials but reduces costly mistakes that may arise from inexperience.
| Factor | DIY Installation | Professional Installation |
| Initial Cost | Lower (no labor fees) | Higher |
| Tools Required | Yes | No |
| Potential Hidden Costs | High (due to mistakes or rework) | Low |
- Time Commitment
– DIY: Depending on your skill level, replacing one window could take several hours or even days if complications arise. – Professional: Experts complete projects more efficiently due to their experience—saving you time and effort.
Pros of DIY Window Replacement
- Avoid paying for professional labor fees.
- Purchase materials within your budget.
- Work on your schedule without waiting for appointments.
- Customize details based on personal preferences.
- Gain valuable skills through hands-on experience.
Cons of DIY Window Replacement
- Improper measurements can result in ill-fitting windows.
- Faulty sealing may lead to drafts or water damage.
- Lifting heavy glass panels can cause injury without proper handling equipment.
- Working at heights increases risks during second-story installations.
- Many manufacturers void warranties if windows are not professionally installed.
Benefits of Professional Window Installation
- Professionals ensure a precise fit with proper alignment.
- Most contractors offer warranties on their work along with product guarantees from manufacturers.
- Experts are trained in safe practices when handling heavy materials or working at height.
- Teams complete projects faster than most homeowners attempting them alone.
Final Thoughts
Deciding between DIY and professional window installation depends largely on your priorities—whether it’s saving money upfront by taking a hands-on approach or investing in expertise for peace of mind long-term. Carefully assess your resources, skills, and comfort level before committing to either option for successful results tailored to your needs.
- Step-by-Step Guide to Expert Window Installation Rockville Homeowners Can Trust
- The Complete Guide to Window Installation Rockville: DIY vs. Professional Approaches
- What to Expect During a Professional Replacement Windows Rockville MD Installation Process
- Expert Tips for Installing Replacement Windows Rockville MD Homes Need
- Replacement Windows Rockville MD: Comprehensive Installation Best Practices Guide